Installation Guide
Get Merge Raw up and running in just a few minutes
Automatic Installation (macOS)
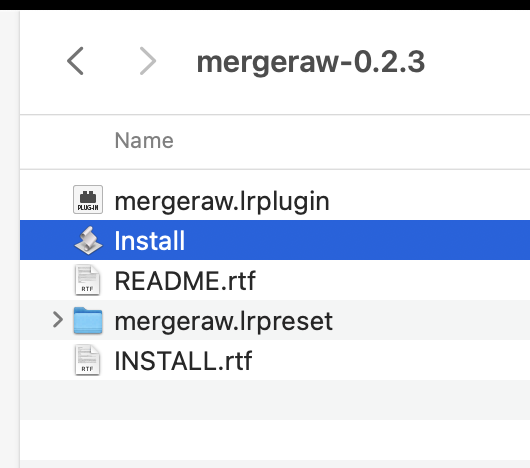
- Download and extract the latest version of Merge Raw
- Double-click the Install app
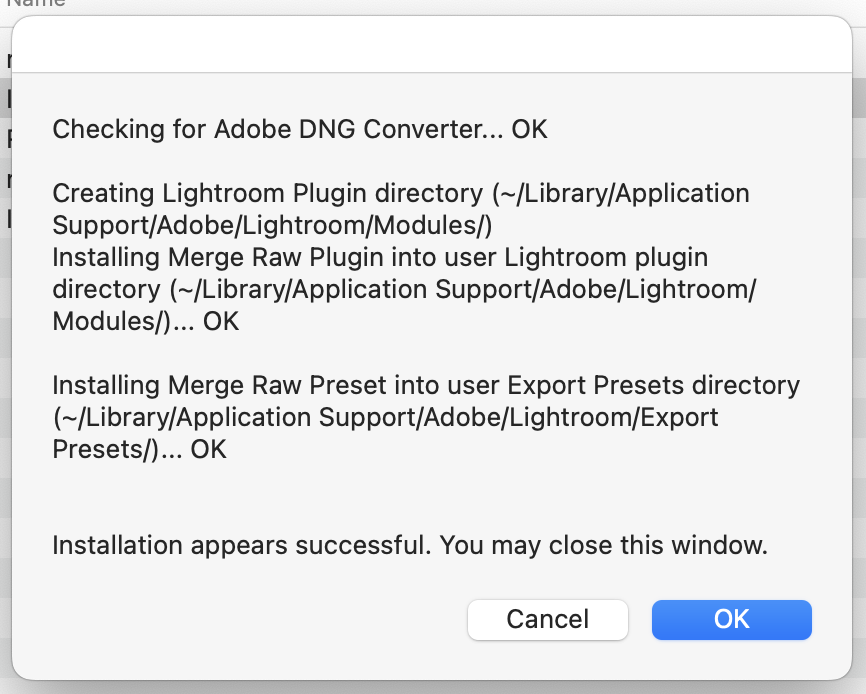
- Click OK to confirm the installation

- If macOS asks whether you want to run an app downloaded from the Internet, click Open
- If macOS refuses to allow you to run the app:
- Right-click or Control-click on the Install app
- Choose Open from the context menu
- Click Open in the confirmation dialog box
- The installer will copy the plugin to the appropriate Lightroom folder
- If installing to a system-wide location, you may need to enter your password
Manual Installation (macOS)
Copy the mergeraw.lrplugin folder to your Lightroom Plugin Directory:
For only the current user:
~/Library/Application Support/Adobe/Lightroom/Modules
For all users:
/Library/Application Support/Adobe/Lightroom/Modules
(may require password)
How to access the Library folder:
- In Finder, use the Go → Go to Folder... menu
- Copy and paste one of the paths above
- Click Go
- Copy the
mergeraw.lrpluginfolder into the Modules folder
Windows Installation
Copy the mergeraw.lrplugin folder to one of these locations:
For only the current user:
%APPDATA%\Adobe\Lightroom\Modules
For all users:
%PROGRAMDATA%\Adobe\Lightroom\Modules
💡 You can copy and paste either path into the Windows Explorer address bar to navigate to the appropriate folder.
After Installation
- Restart Lightroom Classic to load the new plugins
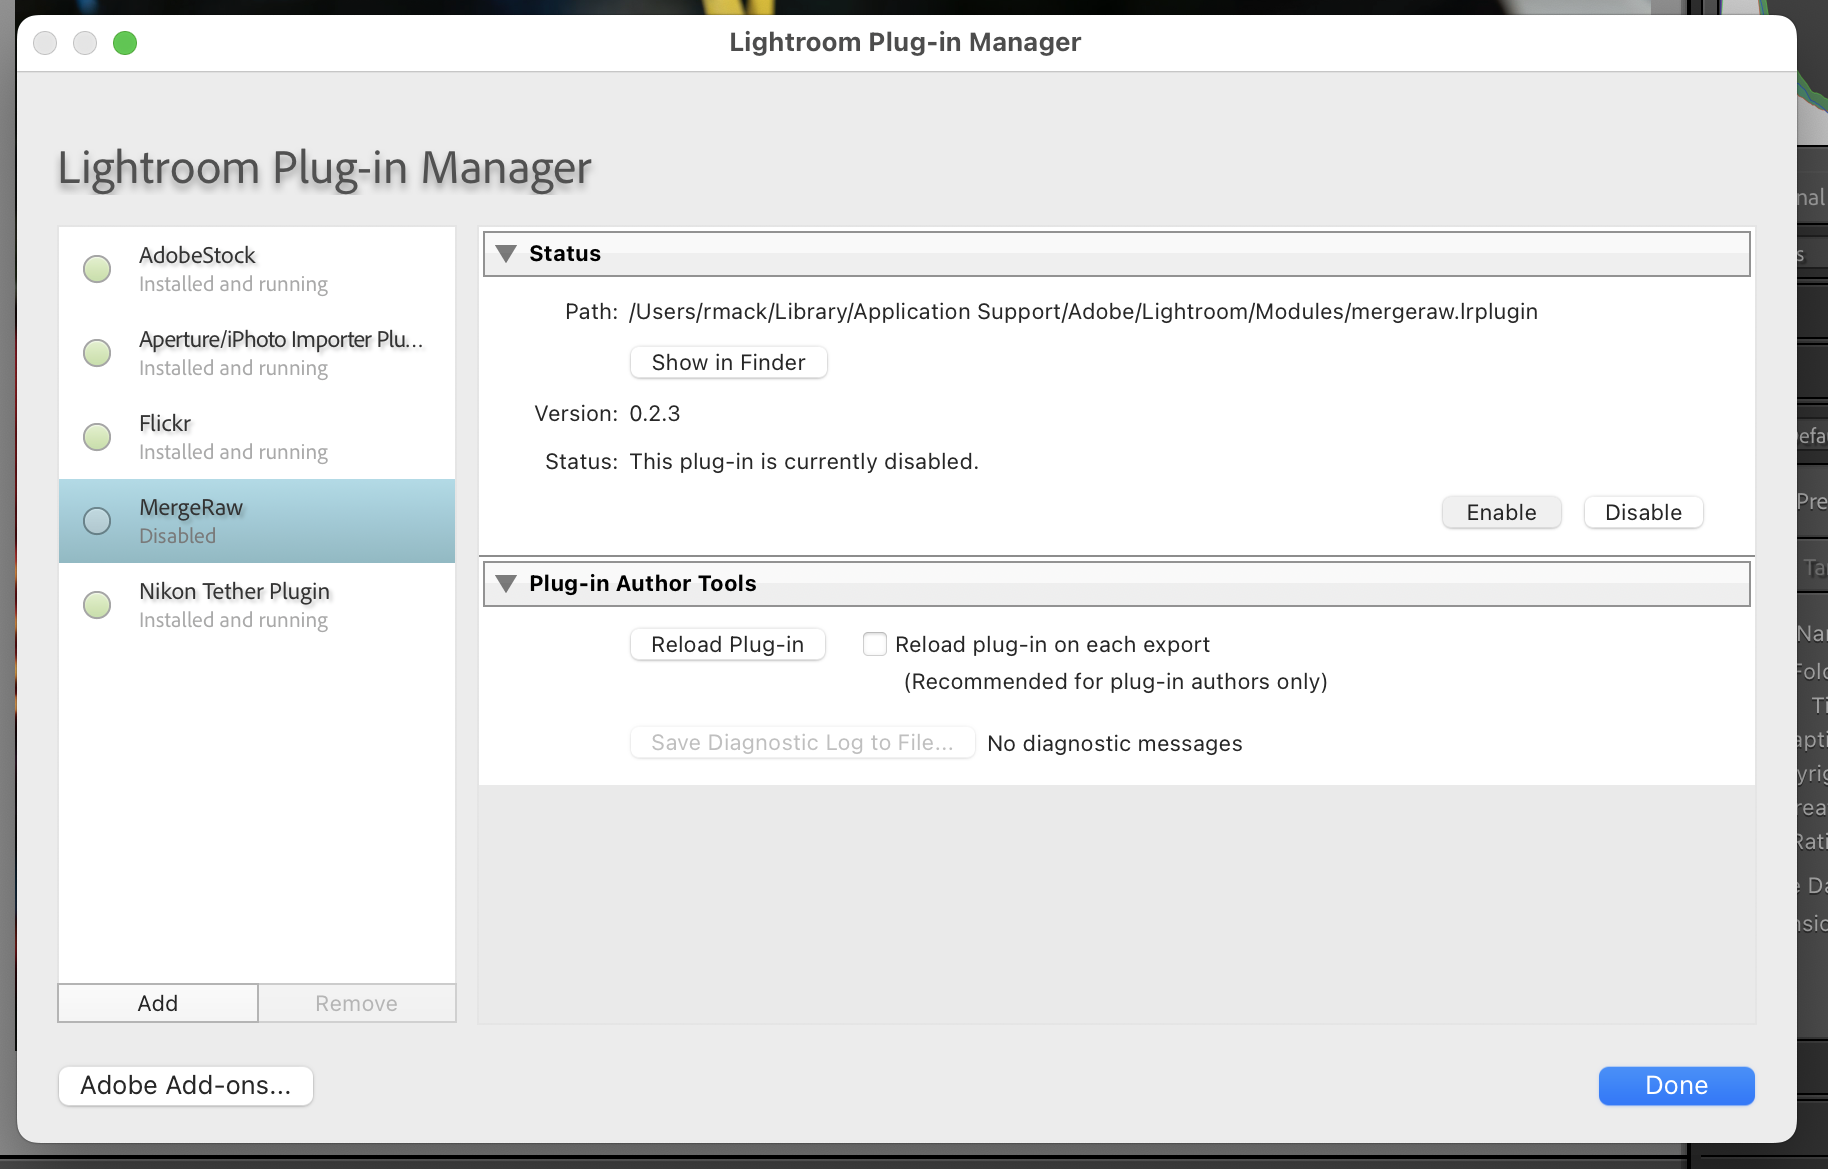
- Verify the plugin is installed by checking File → Plug-in Manager
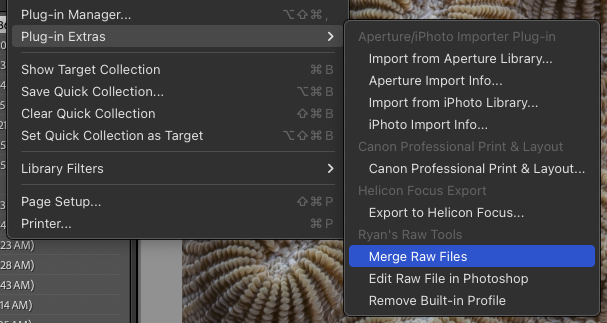
- The plugins will appear in the File → Plug-in Extras → Ryan's Raw Tools menu
- You can also access them from the File → Export menu or by right-clicking on images

Look for these three plugins:
- Merge Raw Files - Main plugin for pixel shift and frame averaging
- Remove Built-In Profile - Remove mandatory lens profiles
- Edit Raw in Photoshop - Round-trip editing while keeping raw flexibility
Troubleshooting
If the plugins don't appear after restarting Lightroom:
- Verify the plugin folder is in the correct location
- Check that you copied the entire
mergeraw.lrpluginfolder, not just its contents - Try installing to the user-specific folder instead of the system-wide folder
- On macOS, ensure the plugin folder has the
.lrpluginextension - Check Lightroom's Plugin Manager (File → Plug-in Manager) to see if the plugin is listed but disabled
Next Steps
Select Images
In Lightroom, select multiple raw files you want to merge (pixel shift sets or bracketed exposures).
Launch Plugin
Right-click on the selected images and choose Merge Raw Files from the context menu.
Choose Settings
Select your alignment mode (Pixel Shift, Standard, or Disabled) and blend mode (Normal, Deghosting, Median, etc.).
Merge!
Click OK and Merge Raw will create a new DNG file in your catalog.